How to Buff Nails the Right Way?

Having beautiful, healthy nails is something many people strive for. Beautiful, shapely nails can make hands look attractive and well-groomed. But without proper care, nails can become dry, brittle, and cracked. Buffing is an essential part of nail maintenance that shapes, smooths, and polishes nails, helping keep nails looking their best. But it’s important to know the right buffing techniques so you don’t end up causing more damage. Buffing your nails is an important part of nail care that helps shape them and make them look their best. But there's a right way and a wrong way to buff nails.
This article will provide a complete guide on how to buff natural or manicured nails at home properly. You’ll learn about choosing the right tools, techniques for gentle shaping and polishing, moisturizing aftercare, mistakes to avoid, and signs it's time for buffing. With these tips, you’ll be able to buff your nails perfectly and keep them looking fabulous.
Read: How to Create Stylish Nail Art Designs with Simple Tools?
Tips To Buff Nails Rightly
Follow these tips to buff your nails the proper way and avoid damage.
1. Gather Your Tools
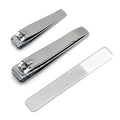
Before you begin buffing, you need to gather the right tools. Here's what you'll need:
Nail file: Look for a file between 180-240 grit. This is a medium grit that will shape without being too harsh.
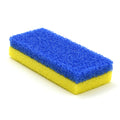
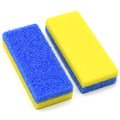
Buffer block: Choose a 24-sided buffer block that has different grits for shaping, shining, and smoothing.
Cuticle oil: This helps hydrate and nourish nails after buffing. Look for vitamin E or jojoba oil.
Hand cream: Any rich moisturizing cream will do. Buffing can cause dryness.
2. Soak and Dry Nails
Start by soaking nails in warm water for 5-10 minutes. This softens them up for easy filing and buffing. Dry the nails thoroughly before moving forward. Any moisture left behind can hinder proper buffing and shaping.
3. File Nails
Use your nail file to shape your nails. File in one direction, working from the outside of the nail towards the center. Use light, even strokes, and avoid sawing back and forth aggressively. This can cause nails to chip and peel. File each nail into the desired shape you want before moving on.
4. Buff Away Ridges
Use the different grits on your buffer block to refine the shape of your nails. Start by using the coarsest grit to buff away any ridges in the nail surface. Apply light, even pressure, and go in one direction with steady, fluid motions.
5. Smooth Out Small Imperfections
The medium grit side can help further smooth the nail and erase any slightly uneven or filled areas. Apply a bit more pressure here and concentrate the buffing on problem spots that need extra refinement.
6. Shine On
Use the fine-grit buffer for the final finish. Polish the top of each nail with light sweeps over the surface. This will create a beautiful natural shine. Don't press too hard here, or you can actually cause micro-abrasions in the nail surface.
7. Soften Cuticles
Once done shaping and polishing, massage some cuticle oil gently into the nail bed and cuticles. Gently push back overgrown cuticle tissue. Buffing can cause hangnails and dryness, so moisturizing is key.
8. Apply Hand Cream
Lastly, slather some rich hand cream onto your hands and nails. The hydration will help nails stay flexible and less prone to cracking and breaking. Let the moisturizer fully absorb before doing anything else with your hands.
9. Avoid These Mistakes
It's easy to mess up and damage nails during buffing by making some common mistakes.
Be sure to avoid:
- Buffing too aggressively - Stay gentle and use light pressure.
- Over-buffing - More than once a week can thin nails.
- Using a coarse file - Pick medium grit for safe shaping.
- Sawing back and forth - Always file in one direction.
- Applying pressure on the sides - Only buff the top surface.
- The heat from friction - Dip nails in cold water if you feel the heat.
10. Maintain Your Manicure
Follow these tips in between buffing sessions to make your manicure last longer:
- Wear gloves for cleaning and gardening
- Apply cuticle oil daily
- Use a nail strengthener if your nails are weak
- File small chips instead of picking at them
When to Buff vs. File?
Buffing and filing serve slightly different purposes:
- Filing helps shape the nails and even out the edges. Files are more abrasive and are better for major shaping.
- Buffing refines shape, smooths ridges, and gives nails a natural shine. It is gentler than filing and leaves a polished look.
For maintenance, use a file to re-shape overgrown nails or even out small breaks. Use a buffer to renew shine and get rid of minor imperfections between manicures.
Signs You Need to Buff Your Nails
Don't wait until your manicure starts looking shabby before figuring out it's time to buff.
Look for these signs:
- Loss of healthy sheen
- Visible ridges running down nails
- Yellow discoloration
- Noticeable scratches and scuffs
- Small snags and cracks
- Cuticles looking ragged
Conclusion
Buffing nails the right way is important for keeping them looking healthy, shapely, and elegant. By gathering the proper buffing tools and supplies, soaking and prepping nails, filing into shape, smoothing ridges, shining up the surface, moisturizing cuticles, and applying hand cream, you can achieve beautiful, polished nails from the comfort of your home. Just be careful to avoid common mistakes like over-buffing and apply only light pressure. You may now know how to buff your nails properly and rightly, and if you need any nail tool, you can get it from Nail Capital USA.
Sample Block Quote
Nam tempus turpis at metus scelerisque placerat nulla deumantos sollicitudin delos felis. Pellentesque diam dolor an elementum et lobortis at mollis ut risus. Curabitur semper sagittis mino de condimentum.

